Introduction To Knitting
Following on from my Introduction To Crochet blog, this post will give you an Introduction To Knitting.
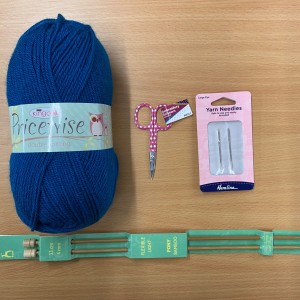
What Will I Need?
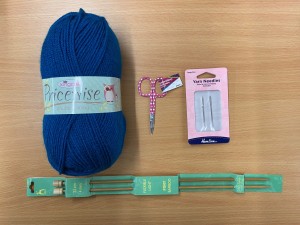
You really do not need a lot of expensive equipment to start knitting.
Yarn - DK weight is very common to start with
Knitting Pins - 4mm is great for DK weight yarn
Scissors - small scissors are great to ensure you don't accidently cut your work
Yarn needles - these have an eye large enough to fit most yarns (though not the thicker weights)
Yarn:
I have yarn in more detail on my Introduction To Crochet post.
Buying Your Knitting Pins:
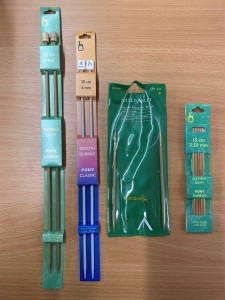
Knitting pins come in different lengths, thicknesses and types. The thickness of pin will be determined by the yarn weight used, and how tight you would like the fabric to be. Common materials used for knitting pins are metal, wood or plastic. Metal pins give a smooth finish allowing the stitches to easily move between pins, which allows for fast knitting. Wooden pins are great for those starting out as the texture of the wood creates a "grippy" surface to stop the stitches falling off to easily. In the photo above the pins working from left to right are : 33cm wooden straight pins, 30cm metal straight pins, metal fixed circular pins and wooden double point needles.
Straight
Straight pins come in various lengths commonly ranging from 25cm to 35cm.
Circular
Circular pins come in two types, fixed and interchangeable. Fixed knitting pins are two short pins joined together by a flexible cable and giving you a longer knitting length commonly from 60cm up to 150cm. Interchangeable knitting pins are the same as fixed, except the pins can be unscrewed and changed from the cables. Circular knitting pins are great if you will have a large number of stitches, using chunky wool and for knitting in the round.
Double Point Needles
Double point needles, also known as DPN's generally come in packs of four or five pins. They are used to knit in the round, which means knitting round and round continuously without going back forth as you knit on and off both ends of the pins as you work round. They are often used for socks and hats. Often 15cm or 20cm.
Holding Your Pins & Yarn:
Holding your pins and yarn is all about how feels most comfortable for you. Have a play about with how to hold the yarn to help you find the way that works best for you to keep the tension. Two commonly known ways are English and Continental.
English: holding the yarn in the right hand.
Continental: holding the yarn in the left hand.
Commonly Used Terms & Abbreviations:
Knit (k) - first stitch you need to learn. With yarn behind, insert pin from front to back, wrap yarn under and over the top of the right pin and pull stitch through.
Purl (p) - with yarn in front, insert right pin from back to front, wrap yarn over and down of the right pin an pull stitch through.
Cast on - several different methods for creating the stitches on your pins to start knitting.
Cast off - used to finish your knitting, again there are several methods depending on the type of finish you require.
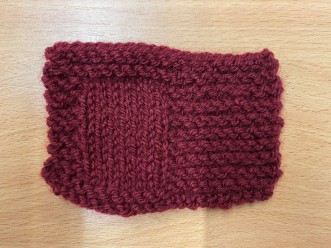
Stocking stitch (st-st) - when working stocking stitch you will do all knit stitches on one side of your work (known as the right side (RS)) and purl stitches on the other (known as the wrong side (WS)). In the picture above the left hand side of swatch is the right side of a piece of stocking stitch.
Garter stitch (g-st) - when working garter stitch, you will work knit stitches on both sides of the work (right side and wrong side). The right hand side of the above swatch shows what both sides of garter stitch would look like (and also the wrong side of stocking stitch).
Yarn over (yo) - moving the working yarn to the other side of your work (so for knit stitch moving the yarn to the front, and for purl stitch to the back) it will create an extra stitch as well as creating a hole in your knitting.
Increase (inc) - there are several ways to increase your stitches which will create a different effect in your knitting. A few examples are, knit front and back (KFB) which creates a bar in the front of your work and make 1 (m1) can give either a left slanting or a right slanting increase.
Decrease (dec) - as with increases, there are several ways to decreases stitches. For example, knit two together (k2tog) and slip slip knit (ssk) crease slanting in different directions.